Inspired by this article, I’ve decided to create a new clock for my living room.
I built it on top of newest Rasperry Pi model 3B+ with its official 7″ display, so some things are a bit different than those explained in that article and the pages it links to.
The full code is available on GitHub.
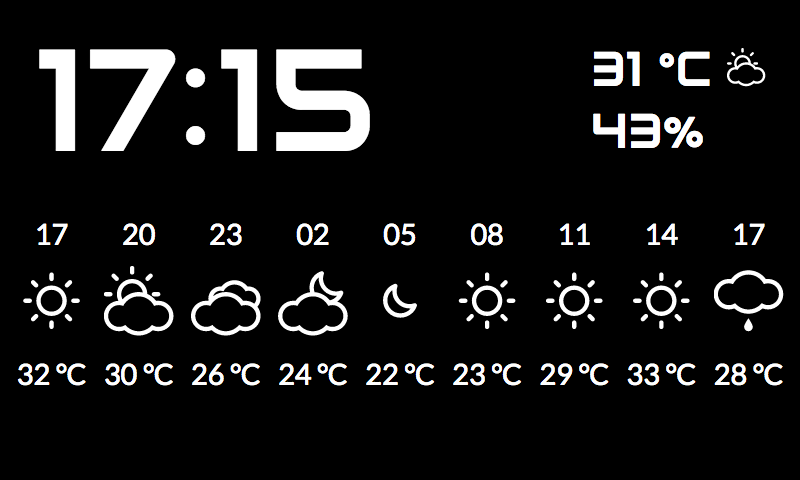
Normally, it’ll show the time and weather forecast for the following 24 hours:
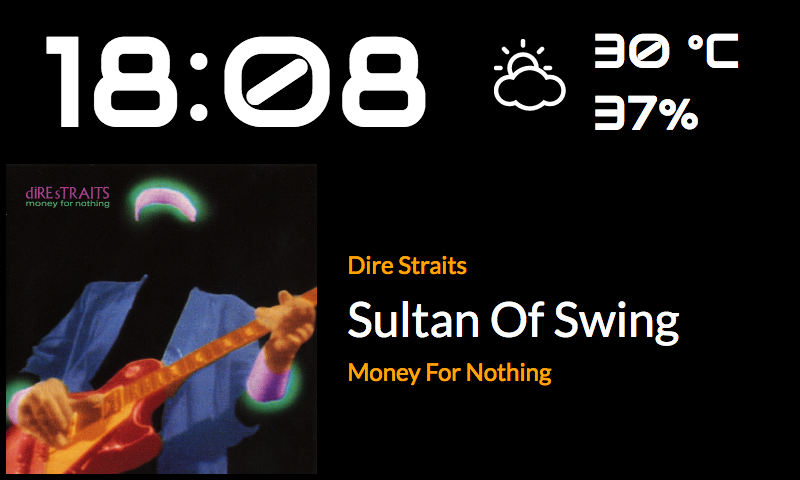
But when I’m playing music (which I usually stream from a Subsonic server with my own Soundwaves), it’ll display the current track:
Setting the Pi up
The first thing to do is to install Raspbian on the Pi: simply follow the instructions on the official site (I’ve used Etcher, as it seemed the easiest way to do it).
Before moving the SD card into the Rasperry Pi, you might want to create an empty file named ssh in the root of the card: it will enable ssh at the first boot, making it easier to proceed if you don’t have a keyboard to connect to the Pi.
If you’re using the display in a case like the one from OneNineDesign, you’ll also need to add this line to config.txt:
Since we need a reliable clock, install chrony to keep the time synchronized with NTP servers:
Booting into the application
From now on, I’ll assume you’re connect to the Pi via ssh. You can find out the ip to use in several different ways: looking at the DHCP leases on your DHCP server/router, using ifconfig in a terminal, etc…
Execute sudo raspi-config and set the Pi to boot to the Desktop, with autologin.
Let’s make sure that there won’t be a visible mouse pointer on the screen. Edit /etc/lightdm/lightdm.conf and look for the line with “xserver-command”. Either uncomment and edit it, or add a new line afterwards:
xserver-command=X -bs -core -nocursor
Install chromium:
Create /home/pi/.xinitrc with the following content:
1 2 3 4 5 6 7 8 9 10 11 12 13 | #!/bin/sh while true; do killall -9 chromium-browser 2>/dev/null # Disable DPMS / Screen blanking xset -dpms xset s off # start without using cache or writing to disk chromium-browser --app=http://url.to.your.clock.setup/ --incognito --disk-cache-dir=/dev/null done; |
url.to.your.clock.setup needs to be the address of the site running the code cloned from GitHub, obviously. 🙂 It can be a different machine, or the very same Raspberry Pi, if you install apache + php on it. Follow the instructions in the readme to configure the web app.
Finally, create a link too:
so that the script will be executed either when X gets started by the display manager or startx.
Now reboot, and if everything went ok, you’ll see your new clock 🙂
One last thing… if you find that the display is too bright, you can adjust the brightness with the command:
with 32 being a number between 0 and 255.
Once you find the level you like, add that command to /etc/rc.local
I just finished installing your weather clock! Looks great !
Thanks !
I’m glad you like it! 🙂
RPI 4 and I only got the day & time display to work. Display on my 7″ screen. Also, full screen display does not work for me. error in the syslog was that tvservice not supported. so after a few tries, I gave up. I had apache, php installed and app deployed and via browser I was only able to see the day+time.
thanks though.
in order to see the forecast, you need to rename backend/config-dist.php to backend/config.php and edit it to enter your OpenWeatherMap API key and the other details.
I’m not super savvy with code – can you change the display color from white to something else, like red?
you could, but it requires a bit of CSS knowledge to modify the provided style.css file
I am not sure what went wrong, but when my Pi boots, I get the login prompt. I log in and then get logged out again…
Any help would be appreciated.
Thanks!
Good Stuff. Working as expected, but did run into a bug explained here.
https://forums.raspberrypi.com/viewtopic.php?p=1988646
Running this fixed it.
echo ‘export CHROMIUM_FLAGS=”$CHROMIUM_FLAGS –use-gl=egl”‘ | sudo tee /etc/chromium.d/egl
I updated index.html and clock.js to allow 12 hours am/pm instead of 24. (haven’t live tested AM – as it hasn’t yet happened.)
I know there are better ways to do this, but I am not a programmer, and this is what I did it.
clock.js
function updateClock()
{
var date = new Date();
$( ‘date’ ).update( date.toLocaleDateString( navigator.language, {
weekday: ‘long’,
day: ‘numeric’,
month: ‘long’,
year: ‘numeric’
} ));
if ((date.getHours()) >= (12)) { // NEW
$( ‘hour’ ).update( fmtTimePart( date.getHours()-12 )) // NEW
$( ‘ampm’ ).update( “PM”) // NEW
} else { //NEW
$( ‘hour’ ).update( fmtTimePart( date.getHours() )) //NEW
$( ‘ampm’ ).update( “AM”) //NEW
} //NEW
// $( ‘hour’ ).update( fmtTimePart( date.getHours() ));
$( ‘minute’ ).update( fmtTimePart( date.getMinutes() ));
updateClock.delay( 1 );
index.html
<div > // NEW
Thank you Simone!
index.html (got cut off during copy/paste in my last comment)
<div > // NEW
looks like I can’t add html to the comment.
in index.html, under “id=”weather””, I added span id=”ampm”.
Is there a way to display the location (city or town)? I am planning on using a couple of Raspberry Pi Zero 2 Ws and 7″ screens I have laying around so each displays the time/weather in a different location. It would be helpful to display the location.
not as it is, but a PR to add it as an option would be welcome